Options on starter aquariums, the kit you’ll need, and your best livestock options.
- Starter Aquarium Options
- Stuff to know before you get started
- Lights
- Filter
- Heater
- Substrate (the floor)
- Hardscape (the rocks)
- Plants
- Water
- Picking Your Fish!
- Putting Your Fish In Your Tank
- The exact products we used
Starter Aquarium Options
If you’re new to fish keeping knowing which starter aquarium is right for you can seem tricky. There are a lot of options! You may find the more research you do the more confused you end up! Not to worry. We’ve put together a few options that make fantastic starter aquariums so you can focus on the fun bit.
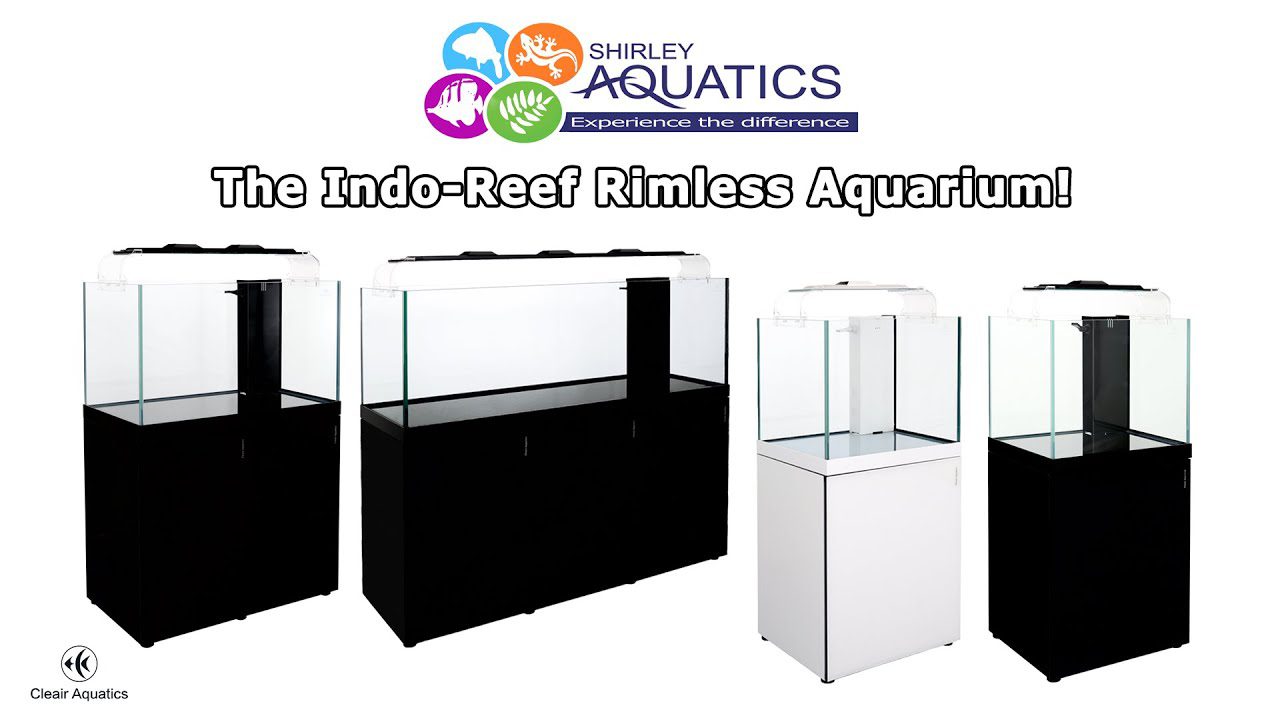
We’ve taken a Ciano Aqua 60 and a Fluval Spec and set them up as ‘starter aquariums’. This will give a basic benchmark for new hobbyists and walk you through the process of setting up your first aquarium.
-
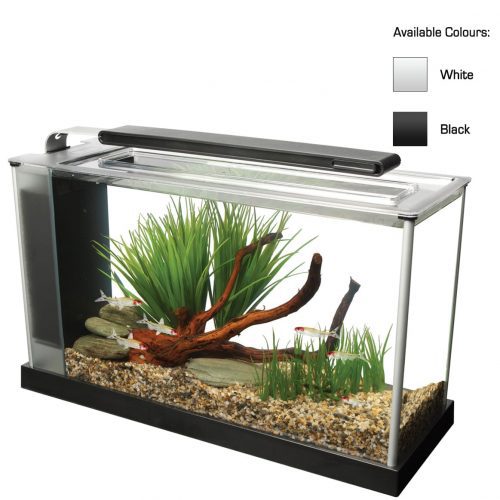 Fluval Spec Aquarium Kit£92.49 – £121.99Price range: £92.49 through £121.99
 -
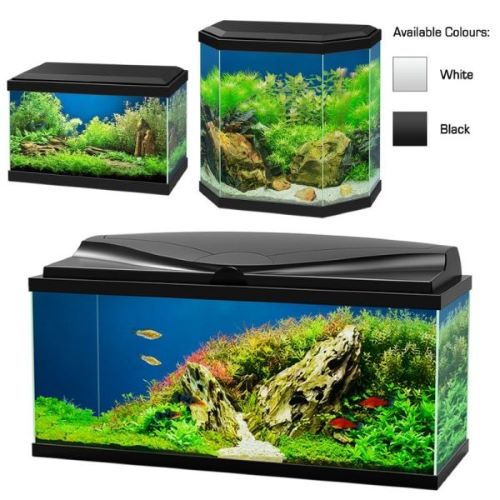 Ciano Aqua LED Aquarium£48.99 – £122.65Price range: £48.99 through £122.65
Before choosing your starter aquarium.
There are a few things you’ll want to consider before diving in. The three S’s. Size, shape, & space.
Size
The size of your tank will impact on how you need to take care of it. A small tank, for example, will need less lighting, a smaller filter, and require less energy to heat. However, changes to water chemistry will happen fast so you’ll need to be on top of your testing and maintenance.
Conversely a larger tank may need a little more lighting, a more powerful pump & filter, and take a bit more energy to heat. Although the volume of water in there will effectively ‘buffer’ changes in the water. Allowing you more time to react to them. It can also hold more fish and plants!
Shape
There are all kinds of wacky shapes of fish tank out there. Our advice is to stick to the tried and tested. Rectangles are used for a reason. The way the water in a tank flows is important for filtration and cleanliness. Whilst the abstract, pointy tank on a stand may look great, it’ll likely have water flow ‘dead spots’ that collect fish & plant waste. This will affect your water chemistry and make maintenance more difficult. For your first time keep it simple.
Space
The final frontier.
Sorry.
It’s obvious you’ll need the space to fit your tank in. It’s important to remember the other bits & pieces that you may also need. Larger tanks will need pumps & filters that may need to be kept outside of the tank itself. Have you got space around the tank for cleaning? We’re not talking about 360 degree 4 foot clearance or anything, but you will need access of some kind. Also have a quick think about where you’ll store your food, little net, water testing kits – stuff like that.
Another consideration is natural light. It’s best to keep your tank out of direct natural light as it removes your ability to control lighting and can encourage algae growth.
Our two examples both have all their gear in the tank itself. The Ciano 60’s hardware is housed in the tank space itself, the the Fluval Spec has a dedicated area on one side of the tank for the filter system & heating.
The bits you wish you knew at the start
There’s always little bits & pieces you’ll wish someone told you before you got started. So here’s a few for your starter aquarium.
- Patience is paramount for fish keeping. Before splashing out on your livestock it’s important to have a healthy, stable environment to put them into. Decide on how you want your tank to look first. Plant your vegetation. Place your princess castles (or whatever else you want in there). Fill with water. Wait. Fish cannot lark about in any old water, you’ll need to make sure it’s suitable. For that you’ll need some ‘friendly bacteria’ in your filter system. For a run down on how to do that check out this great article from Practical Fish keeper.
- Water changes. Be prepared to change the water in your tank regularly. It’s not a particularly gruelling task (only takes an hour or so) but it does seem to slip under the radar a bit.
- Some starter aquariums have everything you’ll need built in. Some won’t. Be aware that you may need to budget for a few extra bits and pieces – especially for larger tanks.
- You may want a bit of space in the freezer spare for frozen fish food.
- Always put a towel down.
Starter aquarium set up
The first thing to do with any tank when you get it home is make sure you’ve got all your bits and pieces.
What you can expect to find in your box;
- The tank itself
- Lid
- Light
- Filter
- Transformer (plug)
What’s sometimes included;
- Heater
- Thermometer
- Extra Filter Media
In our example tanks we added an OASE 100w heater in the Fluval Spec. 100w is more than enough power for a tank of this size and it will be set to around its lowest output setting. The Ciano comes with its own heater included.
Here’s our quick guide to setting up your starter aquarium, in this case a Fluval Spec;
First things first, give your new tank a good clean. Remove everything from its packaging and give it a decent wipe over. Removing any dust or detritus straight away means less work for your filter system and clearer water quicker! Don’t worry if you see any glass sealant on the bottom of your tank – it’s completely fish safe and will be covered by substrate anyway.
TIP! When cleaning the tank we use RO water (reverse osmosis water) which most of you won’t have access to at home. It just means the water has been filtered to a point where over 90% of all the contaminants are removed. This is great for two reasons. 1 – you aren’t introducing even more stuff for your filter to deal with, and 2 – it doesn’t leave smears on your glass! You can buy RO water in store – just pop in and ask a member of staff!
Assembling your starter Aquarium
Lights
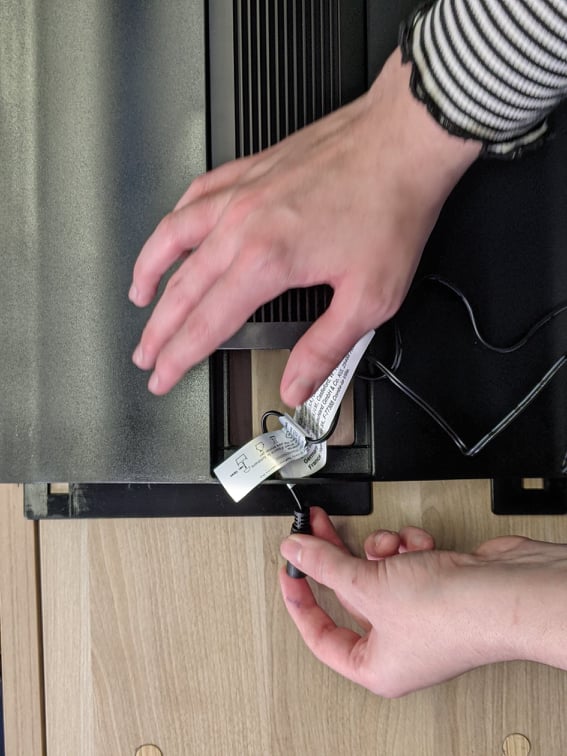
There is some assembly required once you’ve wiped everything down. Don’t worry, it’s very straightforward. If you’ve bought the Ciano 60 don’t clip the lid onto the tank straight away! Your first job is to attach the light. This looks simple but can give even us a fiddly ten minutes of colourful language. There’s a trick to it, though, as discovered by our very own Lewis.
Look at the bottom of the lid. You’ll notice the light should slot in along the middle and there are two ‘slide-in’ clips you can see. the light fitting *should* line up and push across to the right to secure the it in place. Will it? Probably not. So, as you’re looking at it, push the right hand side as far as you can into the right hand clip. Then push the left hand side gently against the left hand clip. The clip will open slightly, the light will pop in, and you’ll be able to wiggle it along the last few millimetres into place.
Trust us. It’s quicker this way.
You’ll have the wire to run along the wire guides in the lid itself to keep them up and out of the way. These will run to the rear of the lid and through the closest hole next to the hinge clips.
The Fluval, by contrast, just pops in. Remember to run the lighting wire through the hole to the side.
Filter
Next up you need to attach the Ciano’s filter to the side of the tank. Unwrap all your bits and bobs and you’ll notice some bits that look a bit like lego and a rectangular space-age looking box – they go together like this;

You’ll want to position the top bar with the holes in it at the top of your tank. This is called a spray bar. The water gets pulled into the bottom of the filter, up through the filter media (that dishwasher tablet thing) and then pumped back out into the tank via the spray bar. Have it slightly above the level of the water so it disturbs the surface of the water. This allows more oxygen to enter the water in your tank. It also helps move your water around a bit – not many fish enjoy being in stagnant water! Using the suction cups attached pop the filter onto a wall of your tank.
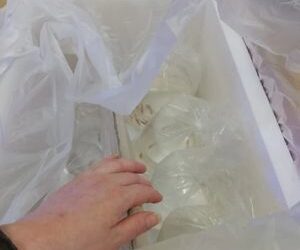
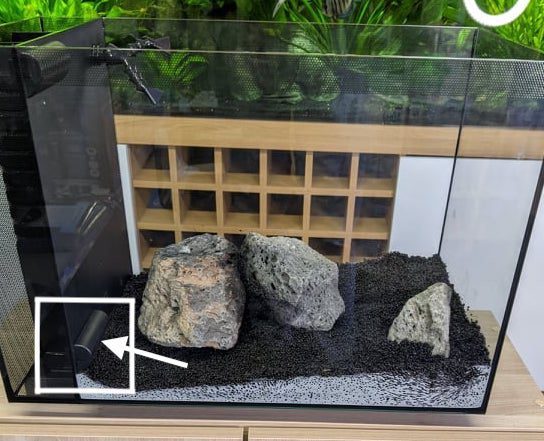
The Fluval’s filtration is more complex but easier to assemble. On one side you’ll notice a blacked out area. This is where all your hardware goes. The middle section is your filter section. If you lift the black handle in the middle you’ll pull up a section of foam with different filter media in there. Lift this out and take the plastic wraps off the bags inside then put them back where they were and pop it back in place.
Heaters
The Ciano heater will have more suction cups – attach it on the other side to the filter. This isn’t a hard and fast rule, it just evens the ‘look’ out a bit and gives your heater a more stable environment to work in. With the Fluval there is a free section next to the filter media. Put your heater in there and use the push-out tabs on the lid to run your wire through.
Decorating Your Starter Aquarium – Step 1 – Substrate
Substrate is the stuff that goes on the bottom. It’s a catch-all term for sand, gravel, general ‘floor stuff’. Substrate is important for a number of reasons. The obvious one is it gives some protection to the bottom of your tank. If you’re having rocks in your aquarium the last thing you want is those resting on glass! It also gives you something to put your plants into.
Beyond how it looks it also contributes to creating a pleasant environment for your eventual inhabitants. Fish like to hide, some actively burrow, and giving them this space to do that will make them happier. It provides enrichment for bottom dwellers, and allows fish to forage for food if that’s their preferred method of eating. Not everyone is keen for a mad scramble at the top of the tank! Finally, it also helps to reduce reflections inside the tank, which can cause stress to your fish. Imagine someone flicking a torch on and off in the corner of your eye all day – not nice.
How much substrate should I use?
We’ve used a 4kg bag of Fluval Stratum in our Fluval Spec tank, and a 10kg bag of Unipack Rosso red mix for our Ciano. We didn’t need all 10kg at all but a 2kg bag wasn’t enough. There’s no reason you couldn’t use two 2kg bags as 4kg was plenty for our Fluval tank. 4 – 6kg will cover these starter tanks well enough to allow you to plant into them and create an interesting floor to your tank. Remember, try to keep things interesting and have a slope to your floor with more substrate at the back of the aquarium and to one side. If you want to read more about aquascaping check out our Beginners Guide to Aquascaping.
-
 Fluval Plant & Shrimp Stratum£9.99 – £34.99Price range: £9.99 through £34.99
 -
Aquarium Rosso Red Mix Gravel£3.99 – £16.99Price range: £3.99 through £16.99


Substrate needs a little prep before you pop it in your tank. Don’t worry – it’s nothing mad, just a rinse. We used a nearby sink for this job – you may wish to use a bath for more wiggle room. Pour your substrate into a net and run it under a tap. You’re aiming to remove most of the dust that’s on the substrate. This will give you clearer water in your tank. Don’t try and run the water through the substrate until it runs cle ar – you need some of that sediment to stay in there. Just get the worst off.
Decorating Your Starter Aquarium – Step 2 – Hardscape
Pour your substrate into your tank and move it around until you’re happy with how the ‘floor’ of your tank now looks. Don’t get too hung up about it, it’s likely to change a bit with the next steps.
First up, your ‘hardscape’ – which just means rocks and/or wood. We would not recommend using wood in your first tank as it takes a bit more prep and can alter your water chemistry in weird and wonderful ways. Whilst this challenge may appeal to experienced hobbyists its not something your want in a starter aquarium.
There are plenty of options when it comes to rocks. We’ve gone with Galapagos rocks in our Fluval tank – these are available in store at £6 per kilo and provide a beautiful rock strata. Again, these need a quick rinse before you put them in your tank!

When positioning your rocks here are a few things to remember;
- It will look more natural to have an odd number than an even number of rocks
- For your first tank don’t worry too much about constructing amazing towers or bridges with rocks. Yes, it’s possible and yes, you can do it with some fish-safe glue, but it’s a big risk for your first time. A rock fall in an aquarium can damage plants, hurt fish, and even crack the bottom of your tank. Keep it simple.
- Try and aim for different shapes and sizes, and provide some hiding areas for your fish.
Decorating your starter aquarium – Step 3 – Plants
It’s possible to go completely overboard with plants. Once you get started and begin looking it’s very easy to get carried away. We only planted our Fluval tank with live plants and endeavoured to keep it as simple as possible to show what is possible with minimal planting.
We used potted Anubias, Java ferns, and Eleccharis Parvula in our tank. Anubias are taller, stemmed plants with wide leaves, Java ferns and mid sized bladed lead style plants, and the Eleccharis are ‘foreground’ plants that, with the right intensity of lighting, can result in a ‘carpeting’ or ‘lawn’ effect where they spread across the bottom of the tank. We chose this combination to provide different heights and layers, as well as different growth speeds to keep things visually appealing as the tank matures. They will also provide shelter and hiding places for the fish that will eventually live with them!


The actual planting is much simpler than you think. You can choose to plant the pot whole, remove the plastic pot (leaving the packing, or removed both and plant the roots straight into the substrate. We decided to remove all of the excess and plant the roots directly into the substrate as it makes less work for the filter if any loose bits of that packing comes away into the water. Taking care not to damage the roots move away some of the substrate. Gently push your plants into place and move the substrate back around them to cover the roots. Remember that the plants will ‘flop’ until the tank has water in it. -don’t worry about that!
TIP! It’s important to keep these plants wet throughout this process and not let them dry out. Spraying them with water as you plant them is advised. Also, only plant when you’re ready to fill the tank with water afterwards.
Artificial plants for your starter aquarium
If you want things even simpler you can always consider artificial plants. You have the option of ‘lifelike’ silk varieties all the way through to multicoloured fluorescent plastic plants to create any environment you please. Artificial plants have the benefit of not creating any waste, your fish won’t be able to eat them, and they don’t need any looking after at all. We are constantly playing around with the artificial environments in our display tanks to show what’s possible.
Filling your starter aquarium
As you may have guessed this bit isn’t as simple as popping a hose into your tank. You must make sure your water is safe. There are plenty of trace elements and chemicals in tap water that make it unsafe for fish. The simplest thing to do is use a product like Tapsafe. you just add it to water before putting it into your tank. It’s very affordable and means your fish will stay happy and healthy.
Remember to pour gently and (if you can) down one side of the glass. This will spread the impact of the water and reduce the amount of disturbance of the substrate. The Fluval Spec we used has a section next to the filter area for pouring water into to reduce this disturbance even more.
Remember! Your water will likely come up super cloudy and brown looking! Don’t panic! You’ve done nothing wrong, it just needs a little time to settle. Here’s ours straight after we put our water in.

At this point you’ll need to leave your tank for a little while – we’d recommend at least a week. This will allow the water to clear, the water chemistry to settle down, and ‘good’ bacteria some time to start building up a culture in the filter media (this might not sound good but it is essential).

Picking your fish!
The bit you’ve been waiting for. You have your tank set up. You understand how it works. It looks great. Time to select and add your inhabitants!
Choosing fish is a very personal experience. We will always advise based on 3 things. 1. How easy the species is to keep, 2. How well they ‘play well with others’, and 3. the best environmental fit. For example, Tetras are a classic ‘starter fish’. Being a schooling fish they prefer being in groups of 6 or more, they prefer a fair amount of plants to hide in, they’re fairly resilient to water chemistry changes and don’t beat up or eat other fish. They’re also very affordable. Perfect.
Other options include Rasboras (relatively small, easy to care for, docile, colourful, but do prefer real plants), Platies (colourful, not fussy eaters, prefers slightly harder water), or Angelfish. Be aware that Angelfish can grow to the size of a small saucer and when they get bigger than their tankmates those tankmates tend to ‘go missing’ if you follow our drift….
We care deeply about our livestock and our advice is always given with the animals best interests at heart. Schooling fish, for example, must be purchased in groups unless being added to an existing group. Not doing so can lead to stressed (and ultimately dead) fish. It’s important to do a bit of research on the fish you’d like to populate your tank with. Often it’s a great way to while away the week or two whilst you’re waiting for your water to settle!
Introducing your fish into your starter Aquarium
Slow and steady wins the race. Here’s a great video from Fluval on how the process of adding fish to your starter aquarium should be done. It’s important to note that this method should be used when you’ve bought fish locally and taken them straight home.
And there you have it! Your starter aquarium is bought, set up, filled, and occupied! Now it’s time to sit back, relax, and enjoy your new pets in the environment you created. We’d love to see pictures of your set up (new or existing!) so please remember to send them to us on social media or tag us in your posts on Insta (@shirleyaquatics) or Facebook (@shirleyaquaticsltd).
All products used in our Starter Aquariums
Tanks
Additional Equipment
Oase 100w HeatUp Heater *we used the 100W but you don’t need anything over 50W for this size, really.
Fluval Tank & Room Digital Thermometer
Substrate
Live Plants
Microsorum Pteropus Java Fern
Artificial Plant *options*
The artificial plants we used in the Ciano tank will be rotated to show the different styles possible with artificial plants but here are some basic starters.
Medium Plant Mat Green and Purple